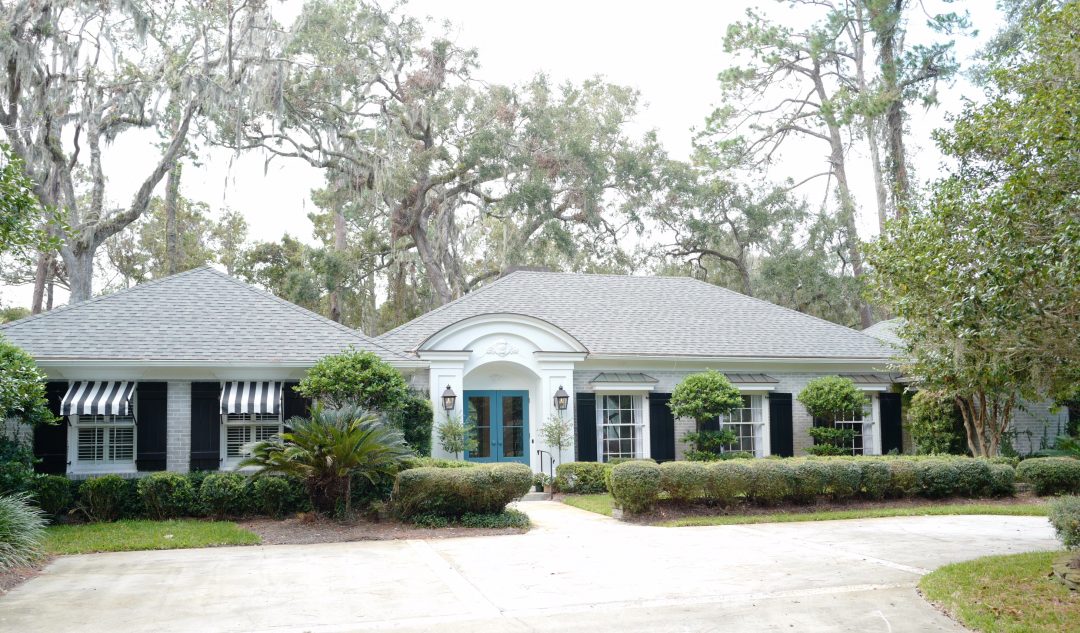

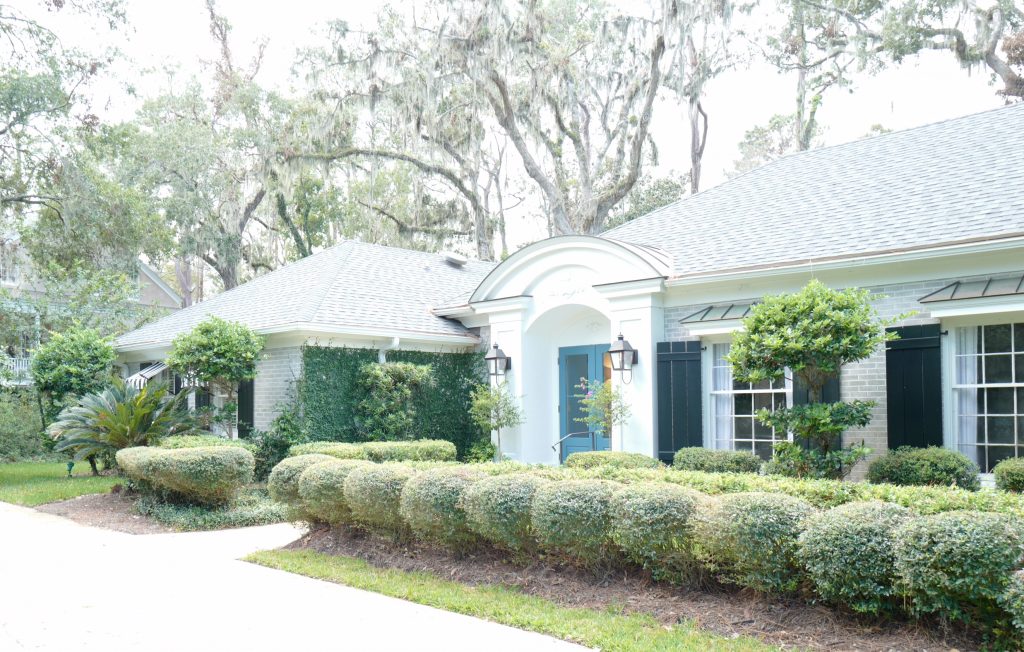
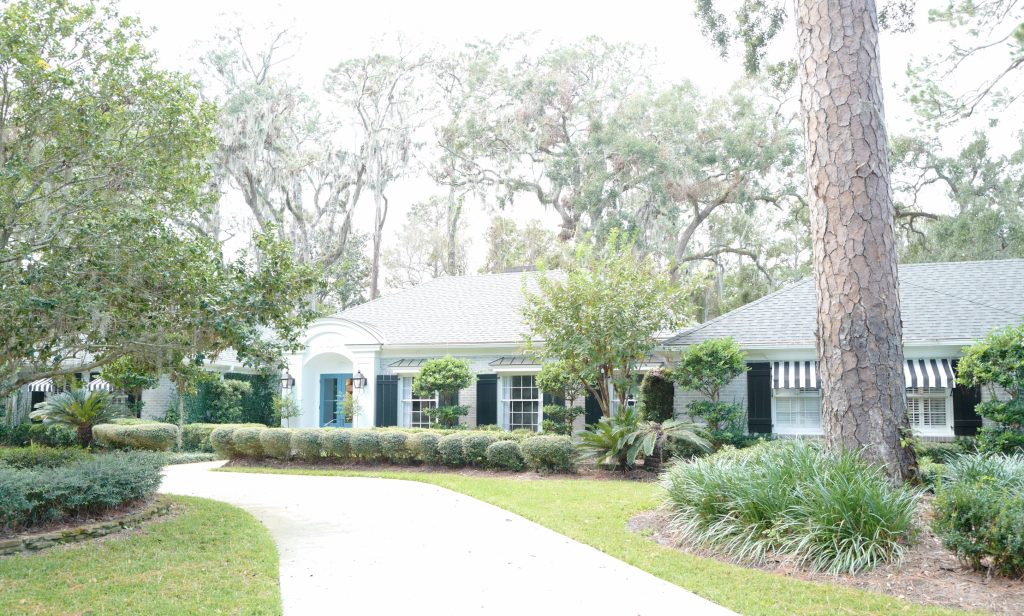
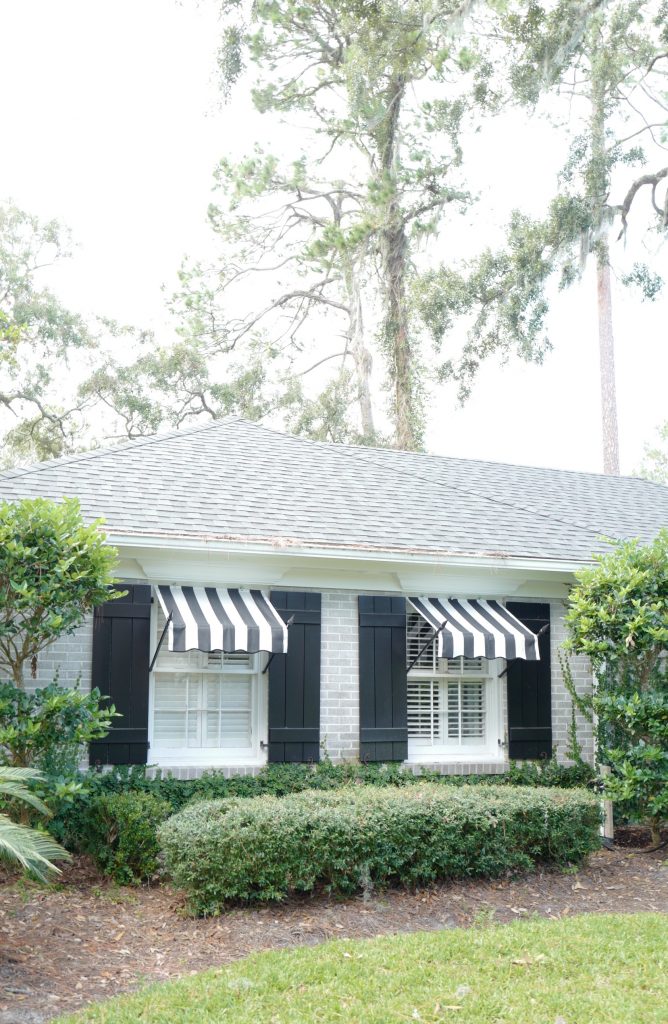
Cottage-Style Home Awnings
Installing Awnings to Add Curb Appeal
This Post is in Partnership with PYC Awnings.
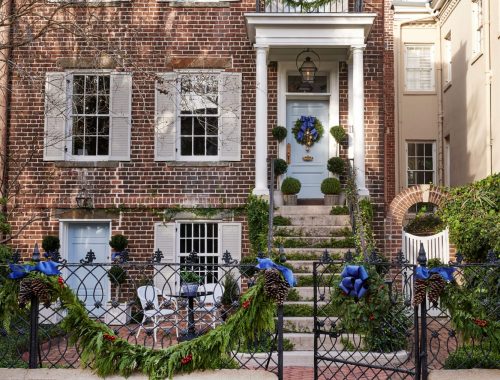
Ever since I moved into our home, I always envisioned striped awnings above our windows, to give it that European cottage look. When I began searching for the perfect awnings for our home, I was disappointed with what I found from a lot awning companies on the market. Most companies estimated a 6-8 week wait before producing the awnings, and the average quote was in excess of $5,000 for four windows and one door! I was beginning to think that adding awnings to our home was a lost cause until I found PYC Awnings online. They offer quality, wrought iron awnings, and back all of them with a 10 year warranty. All awnings are constructed with Sunbrella fabrics, which are made specifically for outdoor weather. Their quote was less than $1,500 for the same product as the $5,000 quote, and they had 10 day shipping! Typically I’m skeptical of buying online from a brand that’s new for me, but this time I did my research (both online and over the phone) and everything checked out. As a result, I’m sharing the things that I learned during this process that will hopefully save you time if you’re looking to add charm to your home with spear awnings!
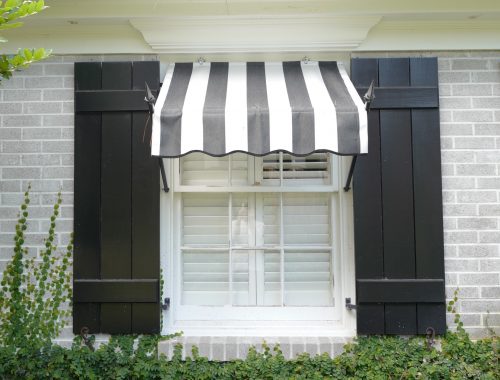
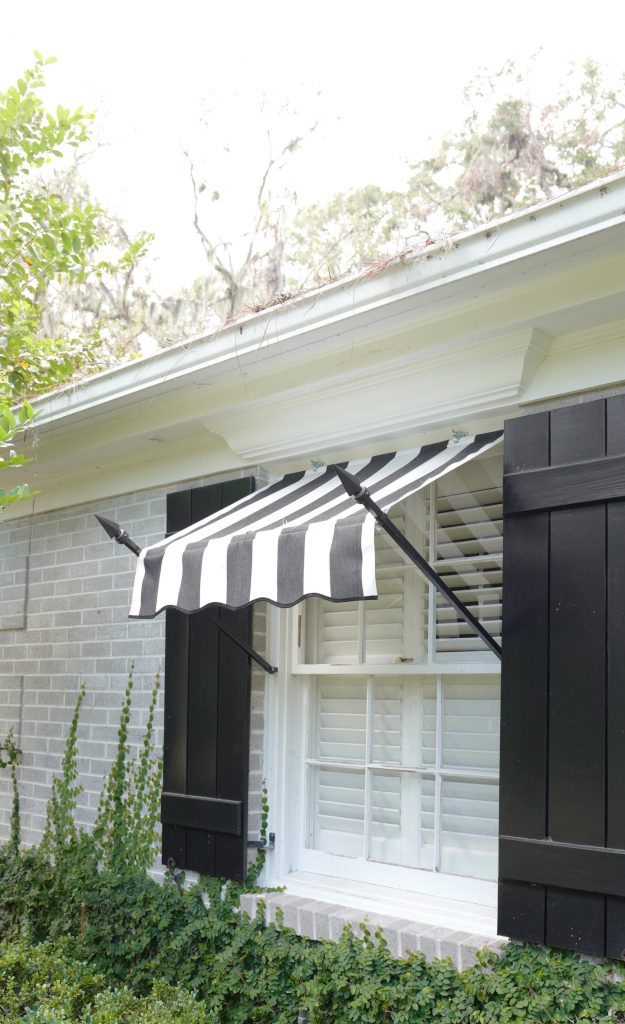
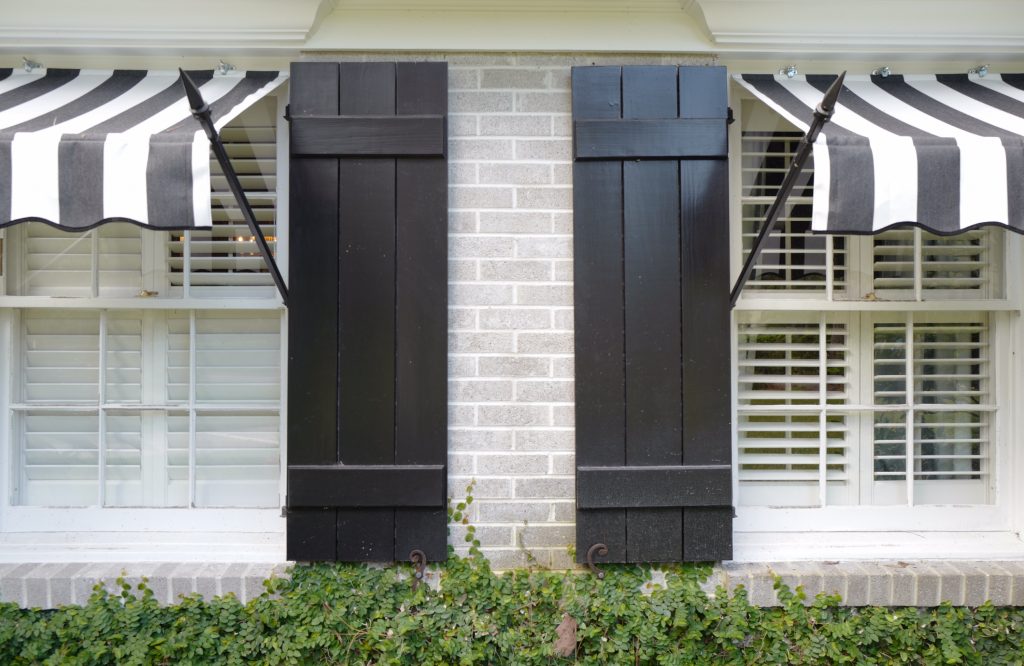
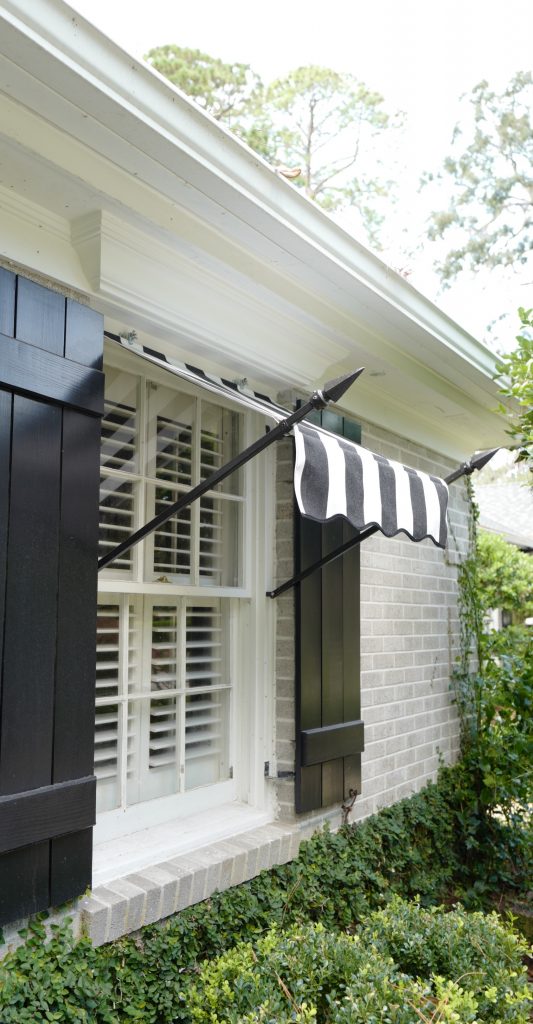
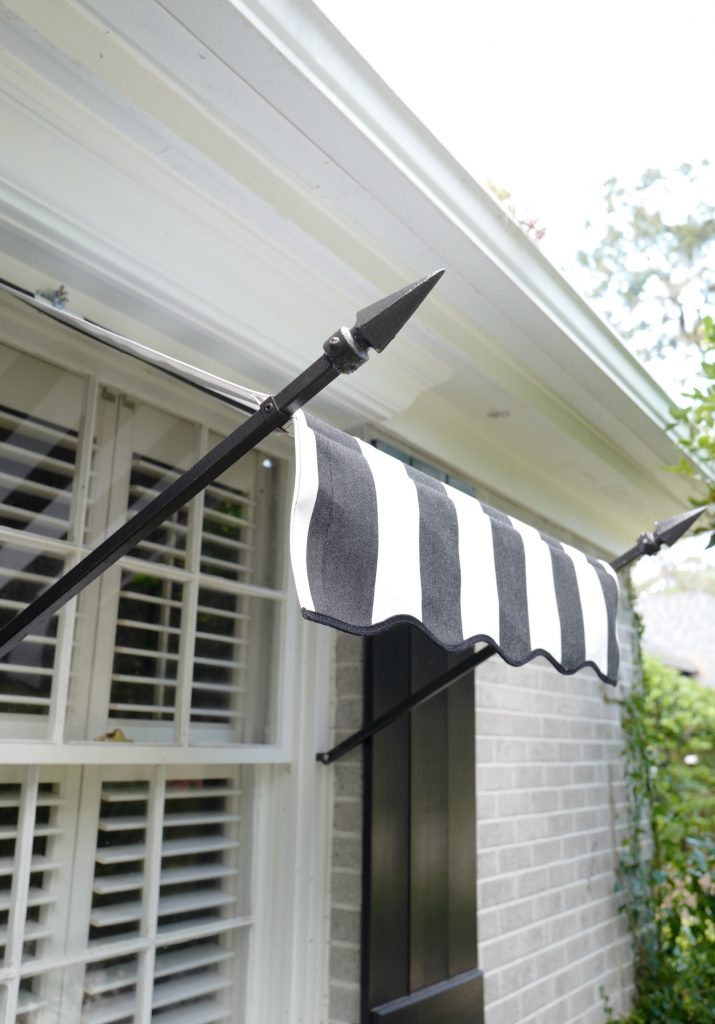
What To Look For: You want to ensure that your awnings are made with quality materials and fabrics. Avoid aluminum poles and finials. Instead opt for wrought iron, which will last the longest. For outdoor fabrics, my go-to is Sunbrella fabrics, which are engineered for performance and provide a longer lasting option than cotton. Sunbrella also comes with a 10 year warranty for fading and tears. Before you order, always ask for a sample to ensure that it’s the correct color. I choose Sunbrella’s Classic Beaufort Stripe, which is your typical black and white stripe with a scalloped edge valance.
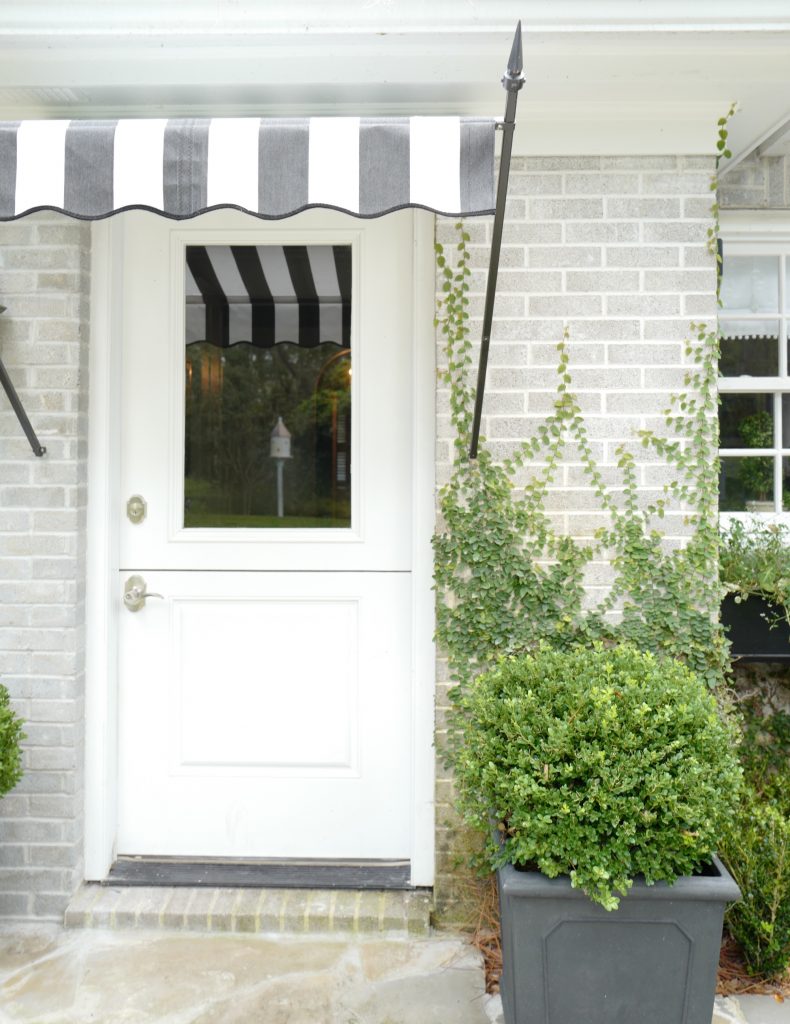
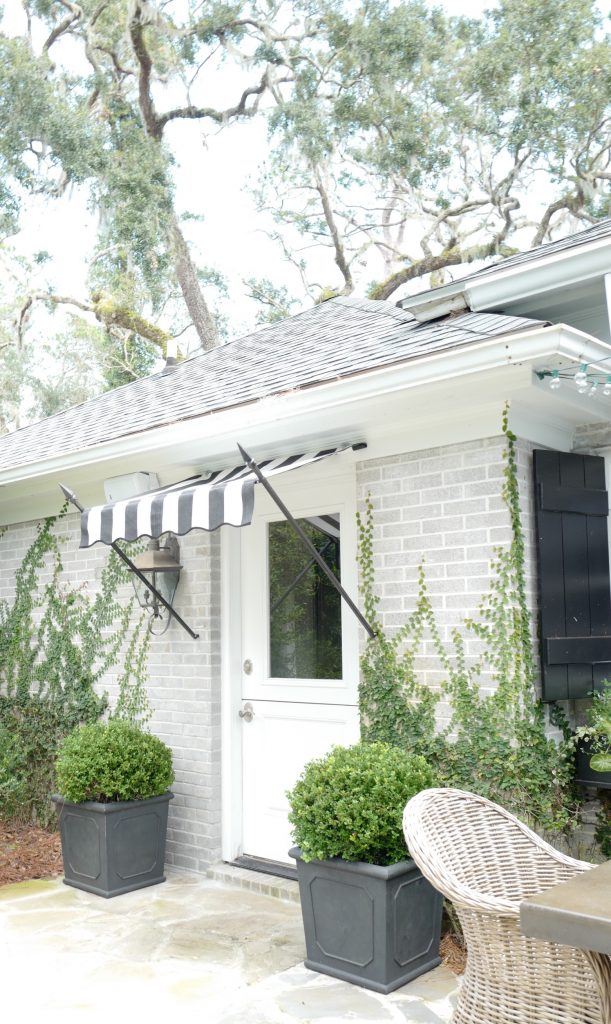
Different Types of Awnings: The awnings on my home are called spear awnings – which consist of wrought iron spears that hold the fabric canopy out from the wall. They have triangular sides with a valance. This particular style helped me achieve both the practical aspect of awnings (shade and style) as well as a beautiful aesthetic element, creating a sense of European elegance.
Measure Three Times. Since you are ordering the awnings, you are the sole person responsible for all the measurements. PYC Awnings provides custom awnings, so if you measure incorrectly you won’t be able to return your order. Before you measure, think about how you want your awnings to look. I have wood shutters flanking my windows and didn’t want the awning to span over the shutters, since I thought it would look too big for the space. After deciding the spear awning would only cover the window, I carefully measured the width, starting and ending where you would drill in the poles. My width was 37.5″ wide and I opted for the 24″ projection. If you have floor to ceiling windows then I would opt for the longer projection. The final thing to consider is how the design affects your shutters. The awning I chose prohibits me from closing my shutters unless the awnings are taken down. Let’s hope we don’t get another hurricane!
Installation. The afternoon I received the awnings, I studied the instructions so I would be ready to tackle the project the next day. (FYI, I was really impressed with the shipping from PYC Awnings! It took quite some time to get them out of the box with all of the wrapping, but it was worth it because they arrived in pristine condition!) They provide almost everything for installation (screws, bolts, nuts, etc.), and the only thing you need is a power drill. I installed these awnings myself and it was super easy (and also a great way to save money)! If you don’t like projects like this, you can easily hire someone to do the job, and it won’t them long at all. The awnings over my four windows were easy to install because I was drilling into wood. Our back door has a brick facade, so I had to enlist help for this part of the installation. For brick and mortar, it’s best to use a special hammer drill with drill bits. Overall, it only took two hours to install the awnings. I’m really happy with the outcome and I get compliments from my neighbors all the time! It took a bit of work on my end, but it saved me thousands of dollars and I’m so happy with the result!
I hope this helps anyone searching for or considering adding awnings to their home! I love how adding awnings can really transform your home and add just the right amount of curb appeal!

2 Comments
I still haven’t decided if I’ll be adding these to my home, but your post did help me! I’ll be reading again with my family so everyone can help decide!
That’s great to hear! Thanks for letting me know! xoxo